Words of Wisdom:
"The best way to predict the future, is to create it!"
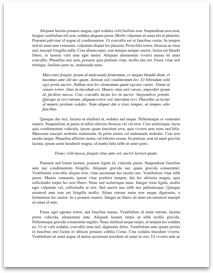
- Trishla.mehta
Modelling & Texturing of Kungfu Panda
- Date Submitted: 03/01/2011 09:51 AM
- Flesch-Kincaid Score: 72.3
- Words: 4647
- Essay Grade: no grades
- Report this Essay
Kung Fu Panda Modeling Part 1
This tutorial needs you to understand basic use of 3dsmax.
Have you seen Kung Fu Panda The Movie (2008)?
It's the story about a lazy, irreverent slacker panda, named Po, who is the biggest fan of Kung Fu around.
But unwittingly Po becomes the chosen one when enemies threaten the village he lived in. In this tutorial you will learn to create Po model, low poly model version.
Don't compare the model you will create with the real one you saw in movie. I simplified many things.
But at least you'll understand how to create one.
I planned to create Po character from modeling, texturing, rigging and skinning, also animate him.
So let's prepare for the first one: modeling.
[pic]
Kung Fu Panda The Movie. I really love this movie.
First, we need a reference image.
Too bad, I can't find any reference image I want in the net.
So, I decide to draw myself. Look at image below, I prepared a blueprint for you, complete with Po drawing (left and side image).
[pic]
Start by creating a sphere in Top viewport.
Use Radius=78 and Segments=12. Position this sphere at Po head (look at image below).
Apply material to this sphere. Use Opacity=50% so you can see blueprint behind. Y
ou can use any color you want.
Later, you can change Opacity value at ay time to help you in modeling.
[pic]
In Left or Front viewport, move sphere down while holding Shift.
You will get sphere clone. Use Copy for cloning method.
In Command Panel, go to Modify tab, increate cloned sphere radius to 117.
Place this cloned sphere in Po's belly. Select one sphere—any sphere you want—then right click and choose Convert to>Convert to Editable Poly.
Next, go to Modify tab, in Edit Geometry rollout, click Attach button and click another sphere.
Two sphere will be combined into one object.
[pic]
Activate Polygon selection.
Select several polygons like image below, and delete them.
[pic]
Change to Vertex selection.
In Front and Left viewport,...
Comments
Express your owns thoughts and ideas on this essay by writing a grade and/or critique.
Sign Up or Login to your account to leave your opinion on this Essay.
Copyright © 2024. EssayDepot.com
No comments